If you have, or want to have soccer fanatics at home, getting your own soccer goals at home is a great way to motivate practice and improve kicking skills. At our household with two enthusiastic players, we have tried different options, including small goals from the local sports store, and even making soccer goals out of PVC. All of these options have had a very short life time, as the kids’ legs get stronger over time and the ball hits the post and net at greater speeds. Basically, any goal we have set up at home has been kicked apart.
Finally, after coming across the clamp range of slip on galvanised iron clamps, the idea of creating sturdy soccer goals out of steel occurred to us.
Using clamp fittings offered a wide range of benefits in constructing the soccer goals. First of all, it is quick, safe and easy to assemble (the kids took over the assembly after the first couple of screws), you need a minimum of tools (an allen key will suffice), it is easy to take apart in case of storage or moving, and finally, as we discovered, fixing mistakes is a simple procedure of unscrewing and replacing the fittings in the correct positions.
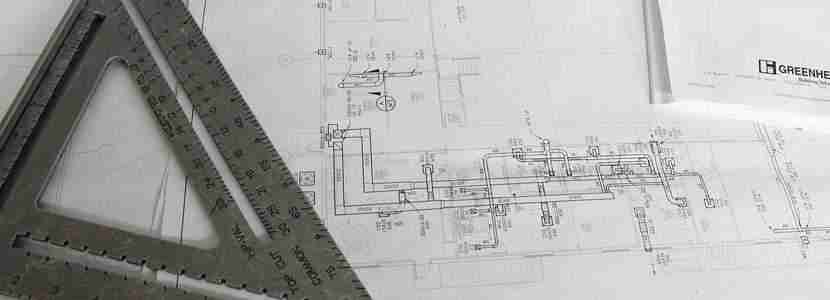
Obviously, the first step is to create a design and plan of the soccer goal you want to create. We opted to create a 3 meter wide and 2 meter high goal, width a depth of 1.25 meters for extra stability. We also chose the thin 25 NB (33mm thick) posts, as the thicker the posts, the higher costs in materials you accrue, and the heavier it will be to move.
With the above design, we calculated that for one soccer goal, we needed the following lengths of pipe:
3 lengths of 6500mm 25NB posts will be sufficient to create a soccer goal of the same size we opted for, although if you want a bigger size goal or a different design you will need to work out your cutting list and materials needed.
To connect the posts together into the soccer goal frame, we needed the following clamp fittings:

Unless you have ordered the posts already cut to length, you will need to cut the pipe into the correct lengths. Work out how to get the most out of the lengths you have and to minimise waste. Measure the right length, mark it with a permanent marker, and cut it using a grinder with a metal cutting disc. Make certain that you wear suitable protective gear when cutting, and to avoid the pipe closing in on the grinding blade while cutting.
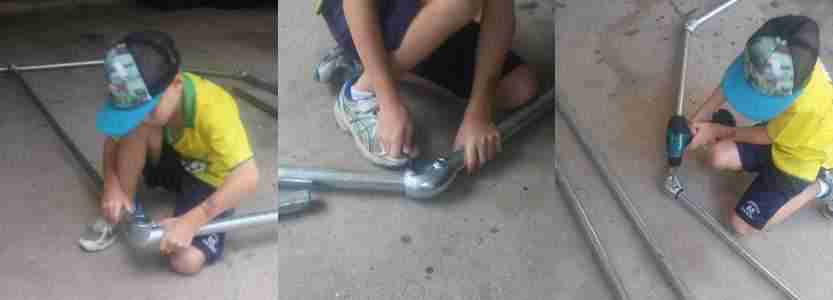
Place the steel posts on a flat surface and attach them using the clamp fittings. The clamp fittings slip on the posts and fasten by winding a fastening screw onto the post. Wind the screws in using an allen key or a drill with the correct size hex bit (For our fittings, we got by using a number 6 hex bit. If you happen to make a mistake, do not panic. It is a simple procedure to unscrew the clamp screws and rectify the mistake.
Tip: assemble the two side frames first before attaching the horizontal bars last.
We acquired some heavy duty bird netting from the local produce place. The netting came in 5 meter widths, so we got a 6 X 5 meter length of mesh to cover the goal frame. In hindsight, I would have ordered a 6.5m length, as it was a stretch to fit it all around the frame. We recommend fastening by winding a nylon string in and around the posts and netting. We used some reusable plastic strips to fasten the netting, as that was what we found lying around. Cut the excess netting off and enjoy.
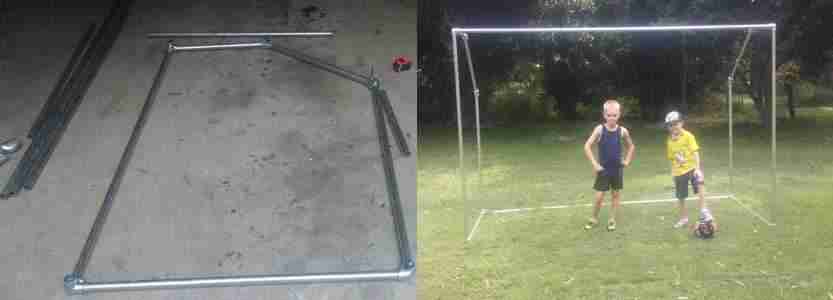
After assembly, it was noticeable that the top back angle could use some more support, as the netting adds inwards pressure on the posts. It is worth considering adding another 3000mm horizontal bar for added stability with a couple of 101 series fittings. The boys are already asking when we are going to make a second goal. When we get a chance, it is no problem to add this extra bar in retrospect.
Even though the extra depth used makes it hard to topple over, it is recommended to use some tent pegs to hold the goal in place.